DropDownList, ComboBox, call it what you like, but it always renders as an html select element. It has an opening<select>tag, and a closing</select>tag. In between, each "ListItem" is housed within an<option>tag. Optionally, they may be subdivided into<optgroup>elements for logical separation of related options. If you provide a value attribute to an option, that is the value that gets posted back when a form housing the select element is submitted. If you omit the value attribute, the text value of the option gets posted back.
At its simplest, for example if you have a static list of items that needs to appear in a DropDown, you can simply put them in your View as html:
<select name="year">
  <option>2010</option>
  <option>2011</option>

  <option>2012</option>
  <option>2013</option>
  <option>2014</option>

  <option>2015</option>
</select>
Or, if the list is a little more dynamic, say if you need to ensure that the starting year is incremented by 1 each New Year's Day:
[WebForms]

<select name="year">

  <option><%= DateTime.Now.Year %></option>
  <option><%= DateTime.Now.AddYears(1).Year %></option>

  <option><%= DateTime.Now.AddYears(2).Year %></option>
  <option><%= DateTime.Now.AddYears(3).Year %></option>

  <option><%= DateTime.Now.AddYears(4).Year %></option>
  <option><%= DateTime.Now.AddYears(5).Year %></option>

</select>
[Razor]

<select name="year">

  <option>@DateTime.Now.Year</option>
  <option>@DateTime.Now.AddYears(1).Year</option>

  <option>@DateTime.Now.AddYears(2).Year</option>
  <option>@DateTime.Now.AddYears(3).Year</option>
  <option>@DateTime.Now.AddYears(4).Year</option>
  <option>@DateTime.Now.AddYears(5).Year</option>

</select>
Or even:
[WebForms]

<select name="year">
  <% for (var i = 0; i < 6; i++){%>

    <option><%= DateTime.Now.AddYears(i).Year %></option>
  <%}%>
</select>
[Razor]

<select name="year">
  @for (var i = 0; i < 6; i++){

    <option>@(DateTime.Now.AddYears(i).Year)</option>
  }
</select>
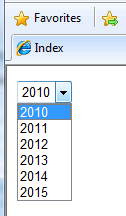
All of the above will render exactly the same html and end result:
If your data comes from a database, you will more likely use one of the 8 overloads of the Html.DropDownList() extension method to create your DropDown. I won't cover all overloads, but it is worth looking at the main ones. The first one -
public static string DropDownList(this HtmlHelper htmlHelper, string name)
- simply accepts a string. Now the documentation currently says that the string should be the name of the form field, which isn't particularly helpful. In fact, not only does it provide the resulting select element with a name and an id, but it also acts as the look-up for an item in the ViewBag having the same dynamic property as the string provided. This ViewBag property is then bound to the helper to create the <option> items. Consequently, the ViewBag property must be a collection of SelectListItems. Here's how to get the Categories from the Northwind sample database using Entity Framework to pass to a DropDownList using the first overload:
public ActionResult Index()
{
  var db = new NorthwindEntities();
  IEnumerable<SelectListItem> items = db.Categories
    .Select(c => new SelectListItem
                   {
                     Value = c.CategoryID.ToString(),
                     Text = c.CategoryName
                   });
  ViewBag.CategoryID = items;
  return View();
}
Notice that each SelectListItem must have aValueand aTextproperty assigned. These are bound at run-time to the value attribute of the option elements and the actual text value for the option. Notice also the odd name given to the ViewBag dynamic property "CategoryID". The reason for this is that the CategoryID is the value that will be passed when the form is submitted, so it makes sense to name it like this. In the View, the overload is used:
[WebForms]

<%= Html.DropDownList("CategoryID") %>
[Razor]

@Html.DropDownList("CategoryID")
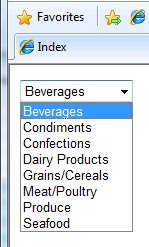
And that's all that's needed to render the following HTML:
<select id="CategoryID" name="CategoryID">
  <option value="1">Beverages</option>

  <option value="2">Condiments</option>
  <option value="3">Confections</option>
  <option value="4">Dairy Products</option>

  <option value="5">Grains/Cereals</option>
  <option value="6">Meat/Poultry</option>
  <option value="7">Produce</option>

  <option value="8">Seafood</option>
</select>
The second overload -
public static string DropDownList(this HtmlHelper htmlHelper, string name, IEnumerable<SelectListItem> selectList)
- is one you quite often see in examples. With this overload, you can return anIEnumerable<SelectListItem>collection or aSelectListobject. We'll have a look at the View first, before seeing two methods of populating the ViewData with alternative objects:
[WebForms]

<%= Html.DropDownList("CategoryID", (IEnumerable<SelectListItem>) ViewBag.Categories) %>
[Razor]

@Html.DropDownList("CategoryID", (IEnumerable<SelectListItem>) ViewBag.Categories)
The first item to go into ViewBag will be theIEnumerable<SelectListItem>object. The code is pretty well identical to the previous example:
public ActionResult Index()
{
  var db = new NorthwindDataContext();
  IEnumerable<SelectListItem> items = db.Categories
    .Select(c => new SelectListItem
                   {
                     Value = c.CategoryID.ToString(),
                     Text = c.CategoryName
                   });
  ViewBag.Categories = items;
  return View();
}
The second passes a SelectList object to ViewBag:
public ActionResult Index()
{
  var db = new NorthwindDataContext();
  var query = db.Categories.Select(c => new { c.CategoryID, c.CategoryName });
  ViewBag.Categories = new SelectList(query.AsEnumerable(), "CategoryID", "CategoryName");
  return View();
}
Using aSelectListis slightly tidier in the Controller, and arguably in the View. TheSelectListconstructor has a couple of overloads which accepts an object representing the selected value:
public ActionResult Index()
{
  var db = new NorthwindDataContext();
  var query = db.Categories.Select(c => new { c.CategoryID, c.CategoryName });
  ViewBag.CategoryId = new SelectList(query.AsEnumerable(), "CategoryID", "CategoryName", 3);
  return View();
}
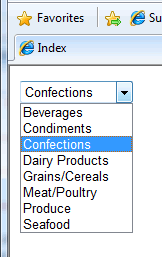
The above will ensure that "Confections" is selected when the list is rendered:
Default Values
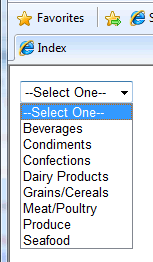
All of the examples so far show the first selectable option visible when the page loads. Most often, however, a default value is desirable, whether this is a blank value or a prompt to the user to "--Select One--" or similar. Another overload takes care of adding this -
public static string DropDownList(this HtmlHelper htmlHelper, string name, IEnumerable<SelectListItem> selectList, string optionLabel).
[WebForms]
<%= Html.DropDownList("CategoryID", (SelectList) ViewBag.CategoryId, "--Select One--") %>
[Razor]
@Html.DropDownList("CategoryID", (SelectList) ViewBag.CategoryId, "--Select One--")
CSS and HTML attributes
Four of the overloads accept parameters for applying HTML attributes to the DropDownList when it is rendered. Two of them accept IDictionary<string, object> while the other two take an object. The object is an anonymous type. The following examples will both render identical html, applying a css class selector and a client-side onchange() event:
[Webforms]

<%= Html.DropDownList(
    "CategoryID",
    (SelectList)ViewBag.CategoryId,
    "--Select One--",
    new Dictionary<string, object>

                      {
                         {"class", "myCssClass"},
                         {"onchange", "someFunction();"}
                      }) %>


<%= Html.DropDownList(
    "CategoryID",
    (SelectList)ViewBag.CategoryId,
    "--Select One--",
    new{  //anonymous type
          @class = "myCssClass",
          onchange = "someFunction();"
       }) %>
[Razor]

@Html.DropDownList(
    "CategoryID",
    (SelectList)ViewBag.CategoryId,
    "--Select One--",
    new Dictionary<string, object>

                      {
                         {"class", "myCssClass"},
                         {"onchange", "someFunction();"}
                      })


@Html.DropDownList(
    "CategoryID",
    (SelectList)ViewBag.CategoryId,
    "--Select One--",
    new{ //anonymous type
          @class = "myCssClass",
          onchange = "someFunction();"
       })
You should notice that the second version (the one using the anonymous type) has a property called "@class". This will render as a literal "class", but needs the @ sign in front of "class" because class is obviously a C# keyword. You might also wonder why there are two ways to add attributes. The second option, using the anonymous object is a lot cleaner and surely would be the sensible choice. However, for one thing, the HTML5 specification includes the ability to add custom attributes to your html mark-up. Each attribute must be prefixed with "data-". If you attempt to create a property in a C# object with a hyphen in its name, you will receive a compiler error. The Dictionary<string, object> approach will solve that problem. Update: Since MVC 5, you can use the anonymous type approach with underscores in the property names. These will be converted to hyphens by MVC.
Where's My AutoPostBack?
One of the most common questions from developers used to the Web Forms model concerns AutoPostBack for DropDownLists in MVC. In Web Forms, it's easy enough to select your DropDownList in design view, head over to the Properties panel in your IDE and set AutoPostBack to true, or to tick the Use AutoPostBack option on the control's smart tag. Quite often, since it is that easy, developers give little thought to what happens behind the scenes when AutoPostBack is used. In fact, an onchange attribute is added to the rendered DropDownList, which fires a javascript event handler, causing the form in which the DropDownList is housed to be submitted. This process has to be done manually within MVC. But it's quite simple. I'll show two ways of achieving this. One will use the most recent overload (above) which takes an object for htmlAttributes, and the other one will show how the same thing can be done using jQuery, unobtrusively. I haven't actually shown DropDownLists within a form element so far, but of course a DropDownList is mostly useless outside of one. Here's the first alternative:
[WebForms]

<% using (Html.BeginForm("Index", "Home", FormMethod.Post, new { id = "TheForm" })){%>

  <%= Html.DropDownList(
    "CategoryID",
    (SelectList) ViewData["Categories"],
    "--Select One--",
    new{
          onchange = "document.getElementById('TheForm').submit();"
       })%>

<%}%>
[Razor]

@using (Html.BeginForm("Index", "Home", FormMethod.Post, new { id = "TheForm" })){

  @Html.DropDownList(
    "CategoryID",
    (SelectList) ViewData["Categories"],
    "--Select One--",
    new{
          onchange = "document.getElementById('TheForm').submit();"
       })
}
And the second that uses jQuery:
<script type="text/javascript">
  $(function() {
    $("#CategoryID").change(function() {
      $('#TheForm').submit();
    });
  });

</script>
[WebForms]
<%using (Html.BeginForm("Index", "Home", FormMethod.Post, new { id = "TheForm" })){%>

  <%=Html.DropDownList("CategoryID", (SelectList) ViewBag.CategoryId, "--Select One--") %>
<%}%>
[Razor]
@using (Html.BeginForm("Index", "Home", FormMethod.Post, new { id = "TheForm" })){

  @Html.DropDownList("CategoryID", (SelectList) ViewBag.CategoryId, "--Select One--")
}
ToolTips
Nothing in the existing set of HtmlHelpers for DropDownLists provides for adding tool tips to select list options at the moment. Tool tips are generated by adding a "title" attribute to each option in the list. Now, this could be achieved by creating your own extension methods that allow you to specify that each option element should have a title, and then apply a value to the title attribute as each option is added to the select list. But that's a fair amount of work... Or, you could use jQuery to do this really easily:
<script type="text/javascript">

  $(function() {
  $("#CategoryID option").each(function() {
      $(this).attr({'title': $(this).html()});
    });
  });
</script>
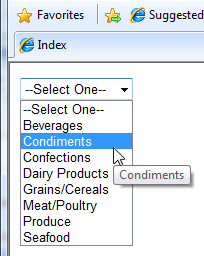
Strongly Typed Helper
All of the examples so far have illustrated the use of the dynamic ViewBag collection to pass values from Controllers to Views. There are strongly typed Html Helpers for the DropDownList to cater for strongly typed views - with all that Intellisense support and compile-time checking. The following example shows a very simple ViewModel class called SelectViewModel:
using System.Collections.Generic;
using System.Web.Mvc;


public class SelectViewModel
{
    public string CategoryId { get; set; }
    public IEnumerable<SelectListItem> List { get; set; }
}
Here's a sample controller action that instantiates a SelectViewModel instance and passes it to the strongly type view:
public ActionResult Index()
{
    var db = new NorthwindDataContext();

    var query = db.Categories.Select(c => new SelectListItem
                                              {
                                                  Value = c.CategoryID.ToString(),
                                                  Text = c.CategoryName,
                                                  Selected = c.CategoryID.Equals(3)
                                              });
    var model = new SelectViewModel
                    {
                        List = query.AsEnumerable()
                    };
    return View(model);
}
Notice how the selected item is identified as the IEnumerable collection of SelectListItems is built from the database query. Finally, in the (Razor) view, the dropdown is rendered with a default option added:
@model SelectViewModel

@Html.DropDownListFor(m => m.CategoryId, Model.List, "--Select One--")
