First, we need a database table with the right kind of data types for storing various information about the uploaded file. At a minimum, we need the the file name, the MIME type and the actual binary data.

The file name and MIME types are both strings, so nvarchar will do for those. The MIME type describes the type of content contained in the file, so a text file would have a MIME type of text/plain. An html file will have a MIME type of text/html. Images generally have an image/ prefix to their MIME type - image/jpg, image/gif etc. Files specific to certain applications have application/ as their prefix: application/vnd.ms-excel or application/vnd.ms-powerpoint. A catch-all MIME type of application/octet-stream covers many other file types, and just tells the browser "this is binary data of some kind". the MIME type is also known as the content-type. The best data type in SQL Server CE for binary data is the image data type. Note - it's not just image files that can stored here, it's any kind of binary data.
You will need to add the FileUpload helper to your site. This is available from the Package Manager as part of ASP.NET Web Pages Helpers.
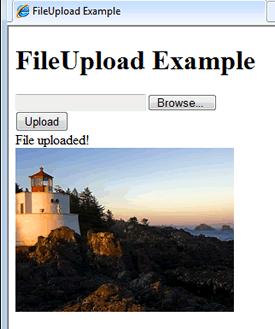
Add a new page and call it upload.cshtml. This page will contain the file upload so that users can get their files to the web server. It will also save those files to the database, and in the case of an image, display the result, or with other file types, it will display a link to the newly saved file. There is a helper method for creating file uploads, FileUpload.GetHtml():
@FileUpload.GetHtml(
    initialNumberOfFiles:1,
    allowMoreFilesToBeAdded:false,
    includeFormTag:true,
    uploadText:"Upload")
The helper lets you specify the number of initial uploads you want to display, whether you would like to allow the user to dynamically create more of them, whether you want the whole thing wrapped in form tags and what you would like as the text on the second button. You cannot change the text on the Browse button. If you are displaying the upload as part of an existing form, you should set includeFormTag to false. Since it is on its own, I am setting it to true so that the form tags render. At the moment, when you run the page, you are presented with the file upload, and it works. However, nothing happens with the uploaded file. Some code is needed.
When working with files, you will generally need to reference System.IO as that is the set of classes that has methods for working specifically with file objects. That needs to be referenced at the top of the page. If files are uploaded, they can be accessed via the Request.Files collection, which has a zero-based index. If one file is uploaded, it will be available in Request.Files[0]. If files multiple are available, the first is at Request.Files[0], the second at Request.Files[1] and so on. Request.Files has a Count property, which returns the actual number of files. In this example, we only need to worry about one file, so Request.Files[0] will get it for us, but only if the form has been submitted. Of course it is possible that someone submits the form without selecting a file. We will test for that condition too.
If there is a file there, we need three pieces of data - it's name, it's type (MIME) and the actual binary data that constitutes the file. That all gets added to the database. Here's the full code for the top of upload.cshtml:
@{
    int id = 0;
    var fileName = "";
    var fileMime = "";
    if (IsPost) {
        var uploadedFile = Request.Files[0];
        fileName = Path.GetFileName(uploadedFile.FileName);
        if(fileName != String.Empty)
        {
            fileMime = uploadedFile.ContentType;
            var fileStream = uploadedFile.InputStream;
            var fileLength = uploadedFile.ContentLength;

            byte[] fileContent = new byte[fileLength];
            fileStream.Read(fileContent, 0, fileLength);
            var db = Database.Open("FileUploading");
            var sql = "INSERT INTO Files (FileName, FileContent, MimeType) VALUES (@0,@1,@2)";
            db.Execute(sql, fileName, fileContent, fileMime);
            id = (int)db.GetLastInsertId();
        }
    }
}
The final line of code gets the identity value of the most recently added row in the database and applies it to the id variable. That's used much further down the page where this code appears:
@if (IsPost && fileName != String.Empty) {
    <span>File uploaded!</span><br/>
    if(fileMime.StartsWith("image")){
        <img src="Download.cshtml?Id=@id" alt="" />
    }
    else {
        <a href="Download.cshtml?Id=@id">Click Here</a>
    }
}
This code, which goes below the file upload code, checks to see if the form has been posted back, and if there was a file. If it has and there is, it will look at the content type, and if it's an image, write an img element to the browser, with the src attribute pointing to another file (download.cshtml) and passing in the new id as a querystring value. This means that the newly added image is displayed. If the file isn't an image, the code writes a hyperlink to the page, again pointing the download.cshtml with a querystring value. Clicking the link will result in the file being downloaded. We'll look at the code in download.cshtml next:
@{
    int id = 0;
    if(Request["Id"].IsInt()){
        id = Request["Id"].AsInt();
        var db = Database.Open("FileUploading");
        var sql = "Select * From Files Where FileId = @0";
        var file = db.QuerySingle(sql, id);
        if(file.MimeType.StartsWith("image/")){
            Response.AddHeader("content-disposition", "inline; filename=" + file.FileName);
        } else {
            Response.AddHeader("content-disposition", "attachment; filename=" + file.FileName);
        }
        Response.ContentType = file.MimeType;
        Response.BinaryWrite((byte[])file.FileContent);
    }
}
When this file is requested, if there is a valid value in the query string, the matching file data is obtained from the database. A Response header is added. If the file is an image, the content-disposition value is set to inline, otherwise it is set to attachment. Then the binary data is written to the Response, resulting in the file being delivered to the user.

A download which includes the code for both files and the database is available here.
