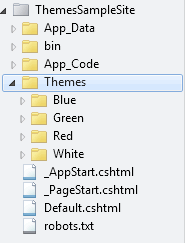
At its most basic, a theme can consist purely of a dedicated CSS style sheet. It may also include a separate layout page, theme-specific sections or partial pages and so on. The Themes helper requires a folder to be designated as the Themes Directory within your site. Each individual theme requires its own folder within that directory. This is illustrated in the following figure which shows a folder named "Themes" (it doesn't have to be named that way, but it makes sense) in which there are four further folders - Blue, Green, Red and White. Each of those folders represent an individual theme. The themes acquires its name from the folder name.
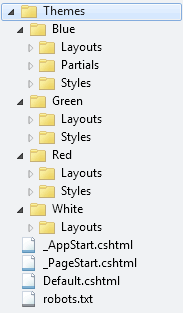
The next image shows these folders expanded to reveal the varying theme-specific sub folders.
Themes are activated through the Themes.Initialize() method. This takes two arguments: a string representing the Themes directory, and the name of the default theme. Taking the structure pictured above as an example, this is how to initialize themes with a default theme of "White":
@{
    Themes.Initialize("~/Themes/", "White");
}
This code is best placed in _AppStart.cshtml, since it executes when the application is first run. Once themes have been intialized, a number of properties and methods become available. Obviously, the ThemeDirectory property will return "Themes", as that has just been set. The CurrentTheme property will return "White" at the moment, as will the DefaultTheme property. The AvailableThemes property returns a ReadOnlyCollection<string>, containing "Blue", "Green", "Red" and "White". This property is populated as a result of iterating the folders in the ThemeDirectory, and grabbing their names. There is one further member of the Themes class - a method called GetResourcePath. There are two overloads for this method: one accepts a string representing the name of a file within the relevant theme folder; and the other accepting a string representing a subfolder within the themes folder, and another string representing the file name. All of these are demonstrated in the sample application which is available for download from the link at the end of the article.
The White theme in the sample application consists purely of a simple layout page in the Layouts folder within the White theme folder:
<!DOCTYPE html>
<html lang="en">
    <head>
        <meta charset="utf-8" />
        <title>Themes Helper</title>
    </head>
    <body>
        @Helpers.ThemePicker()
        @RenderBody()
    </body>
</html>
The Red and Green themes use exactly the same layout page as eachother except for the style sheet reference. Here's the Red theme layout page:
<!DOCTYPE html>
<html lang="en">
    <head>
        <meta charset="utf-8" />
        <title>Themes Helper</title>
        <link href="@Themes.GetResourcePath("Styles", "Red.css")" rel="stylesheet" type="text/css" />
    </head>
    <body>
        @Helpers.ThemePicker()
        @RenderBody()
    </body>
</html>
Notice the use of the Themes.GetResourcePath method to locate the theme-specific CSS file in the Styles folder of the Red theme. The Blue layout includes an additional reference to a partial page called _Special.cshtml:
<!DOCTYPE html>
<html lang="en">
    <head>
        <meta charset="utf-8" />
        <title>Themes Helper</title>
        <link href="@Themes.GetResourcePath("Styles", "Blue.css")" rel="stylesheet" type="text/css" />
    </head>
    <body>
        @Helpers.ThemePicker()
        @RenderPage(Themes.GetResourcePath("Partials", "_Special.cshtml"))
        @RenderBody()
    </body>
</html>
All of these layouts include a method call to a helper called ThemePicker, and this is the mechanism by which users can switch themes. It's just a simple form consisting of a dropdown list:
@helper ThemePicker(){
    var themes = Themes.AvailableThemes.Select(t => new SelectListItem {
        Value = t,
        Text = t,
        Selected = t == Themes.CurrentTheme ? true : false
    });
    <div>
        <form method="post" action="">
            Current Theme: @Html.DropDownList("Theme", "Choose Theme", themes)
            <input type="submit" value="Change theme" />
        </form>
    </div>
}
This helper makes use of the DropDownList HtmlHelper that was discussed in a previous article. LINQ To Objects is used to convert the ReadOnlyCollection of AvailableThemes to a IEnumerable<SelectListItem> for the DropDownList helper. _PageStart.cshtml contains the code that handles the form's submission:
@{
    if(IsPost && !Request["Theme"].IsEmpty()){
        Themes.CurrentTheme = Request["Theme"];
    }
    Layout = Themes.GetResourcePath("Layouts", "_Layout.cshtml");
}
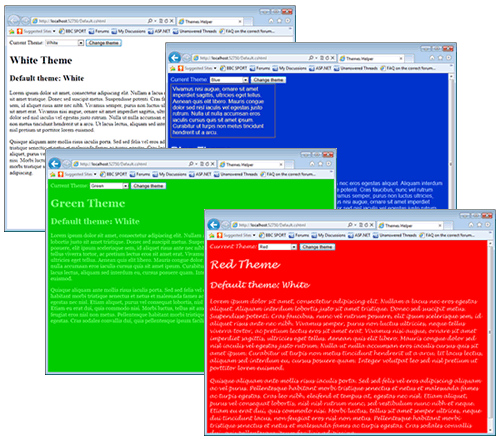
The CurrentTheme is set according to the value that is posted back, and the correct layout page for the current theme is located by the GetResourcePath method. You can see the results of changing the selected theme in the image below.
The source code for the sample application featured in this article is available here.
