Goodbye XML, Hello JSON
In the past, ASP.NET has been built on a foundation of XML. Web Forms .aspx and .ascx files are basically XML files and configuration in previous versions of ASP.NET is managed in an XML file called web.config. The web.config file has a particular structure and a class (System.Web.Configuration.WebConfigurationManager) devoted to providing access to it. In ASP.NET 5 JSON is the preferred format for storing structured information such as configuration. This change has largely been driven, I suspect, by the desire to appeal to web developers working on other platforms who are more used to JSON as a structured data format. The first article in this series has already looked at the new JSON solution and project files: global.json and project.json.
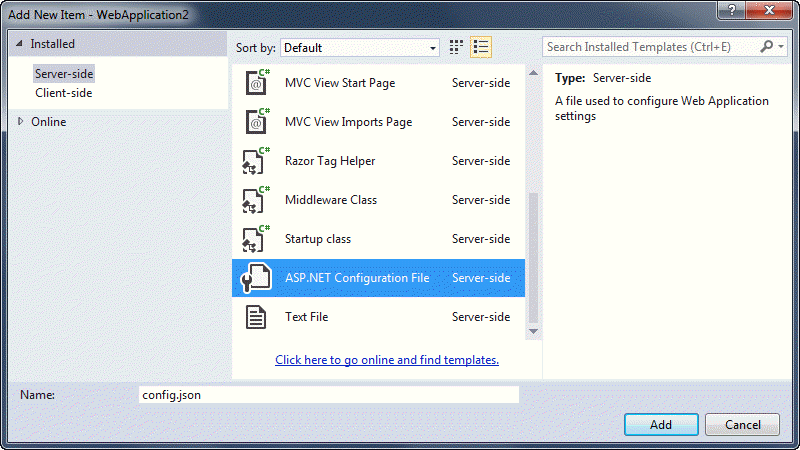
The default replacement for the web.config file is config.json. You can also choose to use an XML file if you prefer, and INI files, environment variables, command line arguments and an in-memory option are supported natively too. The template for a config.json file is labelled as ASP.NET Configuration File in the Add New Item dialog:

When you add one, the templated content provides a placeholder for a connection string:
{
    "Data": {
        "DefaultConnection": {
            "ConnectionString": "Server=(localdb)\\MSSQLLocalDB;Database=_CHANGE_ME;Trusted_Connection=True;"
        }
    }
}
Strongly Typed AppSettings
In earlier versions of ASP.NET, it is quite common to store application-wide constants in the appSettings section of a web.config file. You can store these values in the config.json file instead. Previous Beta release templates included an example of this, but it has been removed from the Beta 6 template. The steps described below demonstrate how to use the config.json file to store appsettings and how to provide strongly-typed access to them.
-
Add the highlighted code to the config.json file:
{
    "AppSettings" : {
        "SiteTitle" :  "My Web Site"
    },
    "Data": {
        "DefaultConnection": {
            "ConnectionString": "Server=(localdb)\\MSSQLLocalDB;Database=_CHANGE_ME;Trusted_Connection=True;"
        }
    }
}
Right click on the Properties node in Solution Explorer (depicted by a wrench icon) and select Add » New Item.
Add a C# class file named AppSettings.cs and replace its default content with the following:
namespace WebApplication2
{
    public class AppSettings
    {
        public string SiteTitle { get; set; }
    }
}
Change the dependencies section in project.json to include the highlighted lines below
  "dependencies": {
    "Microsoft.AspNet.Server.IIS": "1.0.0-beta6",
    "Microsoft.AspNet.Server.WebListener": "1.0.0-beta6",
    "Microsoft.AspNet.Mvc": "6.0.0-beta6",
    "Microsoft.Framework.Configuration.Json": "1.0.0-beta6"
  },
-
Make the following highlighted changes to Startup.cs:
using Microsoft.AspNet.Builder;
using Microsoft.AspNet.Hosting;
using Microsoft.AspNet.Http;
using Microsoft.Framework.Configuration;
using Microsoft.Framework.DependencyInjection;
using Microsoft.Framework.OptionsModel;
using Microsoft.Framework.Runtime;

namespace WebApplication2
{
    public class Startup
    {
        public IConfiguration Configuration { get; set; }

        public Startup(IHostingEnvironment env, IApplicationEnvironment appEnv)
        {
            var builder = new ConfigurationBuilder(appEnv.ApplicationBasePath)
                .AddJsonFile("config.json");
            Configuration = builder.Build();
        }
        public void ConfigureServices(IServiceCollection services)
        {
            services.Configure<AppSettings>(Configuration.GetConfigurationSection("AppSettings"));
            services.AddMvc();
        }

        public void Configure(IApplicationBuilder app)
        {
            var appSettings = app.ApplicationServices.GetService<IOptions<AppSettings>>();
            app.Run(async (context) =>
            {
                await context.Response.WriteAsync(appSettings.Options.SiteTitle);
            });
        }
    }
}
-
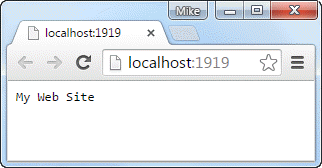
Press Ctrl+F5 to run the application without debugging. You should see "My Web Site" written to the browser.

You started by adding a new section called AppSettings to the config.json file and declaring a property with a value. Then you created a C# class called AppSettings with one property that matches the one you added to the config file. The AppSettings class is designed to provide strongly typed access to the appSettings section of the config.json file. You added a couple of packages to the project.json file to make them available to the application. The first package enables you to use JSON as the format for your configuration data. The second package introduces MVC into the application.
In the Startup class, you added a constructor where you instantiated a variable representing the project's configuration as the config.json file and assigned that to a property that you created of type IConfiguration. This holds the values loaded from the configuration source (the config.json file). You made the AppSettings available to the application by registering it with the dependency injection system in the ConfigureServices method. The method you used mapped the json values from the configuration file to the AppSettings class. You also registered the MVC framework with the dependency injection system. Finally, you used the GetService<T> extension method to retrieve the AppSettings from the DI system in the Startup class'sConfigure method where you used them to write the SiteTitle value to the browser.
Summary
The configuration model introduced with ASP.NET 5 is a world away from the one in previous versions of ASP.NET. It is a plug and play system that supports various data formats (JSON, XML, INI files) out of the box. You can also write your own configuration providers to cater for alternative formats. This article looked at the default JSON format and saw how to add new sections. It also covered how to reference the values in the new section in a strongy typed manner through the use of Options. You saw how to make the configuration available as a service which you registered with the built-in Dependency Injection system. In the next article, I will explore dependency injection in ASP.NET 5 in more detail.
