Resources are collections of key/values compiled to a .resources file. There are a number of ways to create resources. The simplest option is to use the Visual Studio resources designer to generate XML-based .resx files, which is invoked when you choose Resource File as the type of item to add to a project. That is the approach I shall use.
Adding Page-Specific Resource files
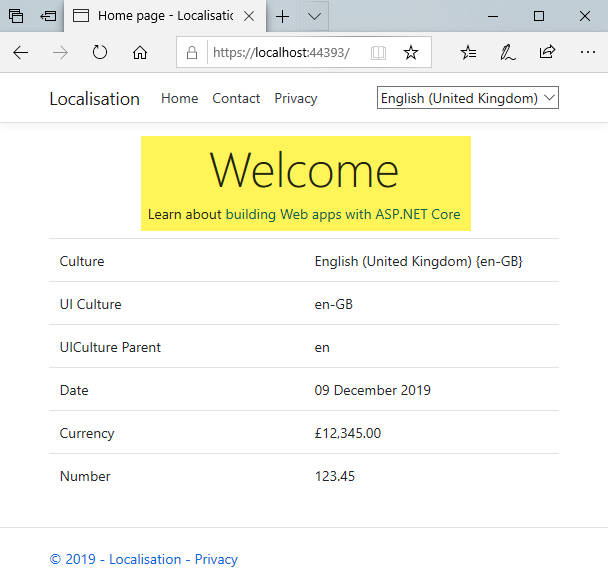
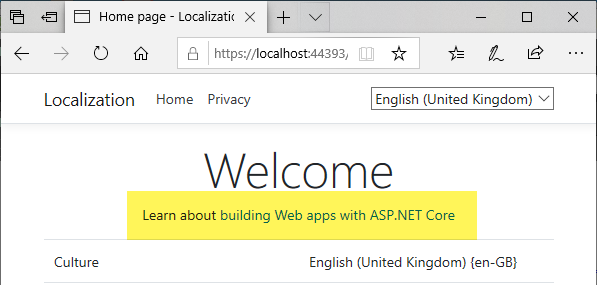
In this exercise, I will produce resources to house the translations for the Index page in the site developed in the last article, which shows how to configure a Razor Pages application for localisation and then how to work with cultures. The two items that will be translated are the Welcome heading and the text below it that invites visitors to learn more about developing with ASP.NET Core, highlighted here:
-
Add new folder named Resources to the application.
-
Add a folder named Pages to the Resources folder.
-
Add a Resource file to the Pages folder and name it IndexModel.en.resx. This resource will contain the content for the
en(English) culture. The resulting folder structure should look like this: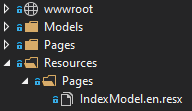
The structure is significant, because it mirrors that for the Index.cshtml.cs file which this resource is designed for (ignoring the root Pages or Resources folder). This approach adopts the path naming convention to ensure that the correct resource is found for the class which it is designed to be used by. The alternative convention is known as dot naming. If you were to adopt the dot naming convention, you would create a resource file in the Resources folder named Pages.IndexModel.en.resx.
Add a key called Learn to the resource file, and copy and paste the HTML under the Welcome heading from the Index page into the designer:
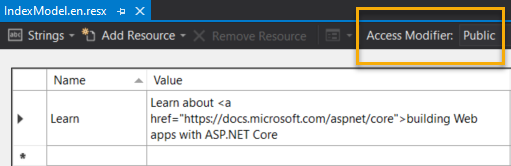
Important: Ensure that the access modifer for the resource is set to Public, as indicated in the image above.
Add the following
usingdirective to the ViewImports file@using Microsoft.Extensions.Localization;
-
Alter the code in Index.cshtml so that the code up to the HTML table introduced in the last article looks like this:
@page
@inject IStringLocalizer<IndexModel> localizer
@inject IHtmlLocalizer<IndexModel> htmlLocalizer
@model IndexModel
@{
    ViewData["Title"] = "Home page";
    var requestCultureFeature = HttpContext.Features.Get<IRequestCultureFeature>();
    var requestCulture = requestCultureFeature.RequestCulture;
}

<div class="text-center">
    <h1 class="display-4">@localizer["Welcome"]</h1>
    <p>@htmlLocalizer["Learn"]</p>
</div>
Two view localisation services have been injected into the page -
IStringLocalizer<T>andIHtmlLocalizer<T>. The first is responsible for locating and rendering strings in resources named after the type passed in to theTparameter. The second service does the same with HTML. They both work in the same way - they locate the correct resource based on a combination of the name of the type passed in (hence the importance of the correct configuration in step 3) and the culture of the current request. Then they retrieve the item with the key that is passed in to the indexer if it can be found. If no match is found, either in terms of the key or the expected resource file, the string passed in to the indexer is rendered. -
Just like the rest of the localisation API, the view localizer services are not registered by default, so you need to register then in
ConfigureServices:services.AddMvc().AddViewLocalization();
Much of the localisation API was included as part of MVC, before Razor Pages became a thing. The
AddViewLocalizationmethod is an extension method on theIMvcBuilderinterface. Hence the need to callAddMvcfirst.If you run the application as it is currently, the words "Welcome" and "Learn" are rendered to the page:
At the moment, the application is looking for resource files in the root folder. Since they are not there, you need to tell the localization service where to find them. This is done in
ConfigureServices. Adjust the existing
AddLocalizationcall (added in the first article) to include the relevant option that specifies theResourcesPath:services.AddLocalization(options => options.ResourcesPath = "Resources");
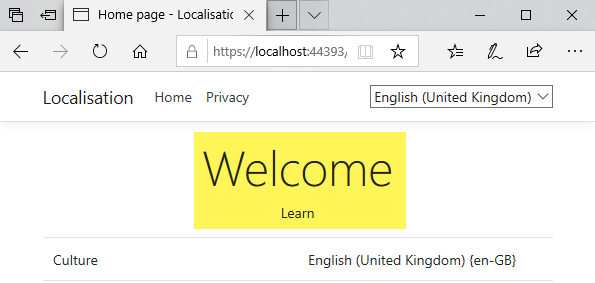
Now when you run the application, the Learn placeholder is replaced with the HTML that you added to the resource file:
The resource file is located by taking the full name of the type passed in to the
Tparameter (e.gWebApplication1.Pages.IndexModel) and removing the assembly name (leavingPages.IndexModel). Then the culture is added to the resource name, so the framework will look in theResourcePathfolder for a resource named either Pages.IndexModel.en.resx (dot notation) or Pages/IndexModel.en.resx (path notation, which is what was used here).Add another resource file to the Resources/Pages folder, this one named IndexModel.fr.resx, and in it, add the following two entries:
Learn En savoir plus <a href="https://docs.microsoft.com/aspnet/core">sur la création d'applications Web avec ASP.NET Core</a>. Welcome Bienvenue Then add one more named IndexModel.de.resx, with the following two entries:
Learn Erfahren Sie mehr <a href="https://docs.microsoft.com/aspnet/core">über das Erstellen von Web-Apps mit ASP.NET Core</a>. Welcome Willkommen Note: all translations provided by the Bing translator, so apologies if they are way off...
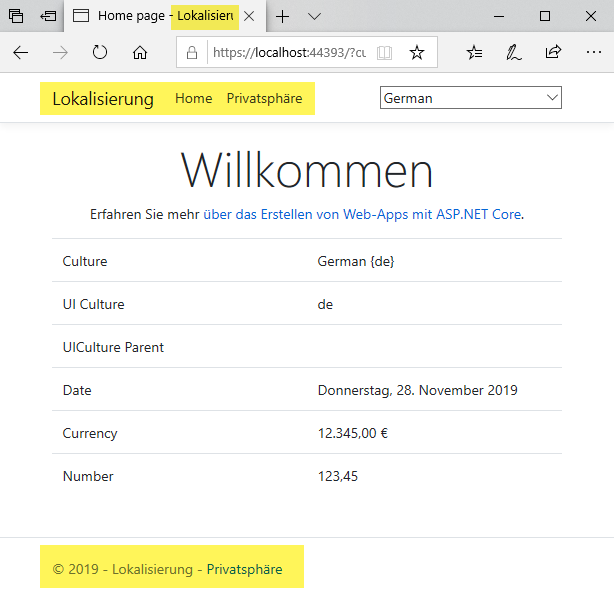
Now when you run the application, you can use the culture switcher (again, added in the first article) to switch between German and French to see the new resources being used. If you try any of the languages for which no resources have been provided, you will see the key value rendered instead.
Common Resources
The resources that have been developed so far are page-specific. They are
typed to the IndexModel. Technically, there is nothing to stop you
injecting an IStringLocalizer<IndexModel> into any page. But there
is an alternative approach to registering resources that lends itself more to
page-agnostic translations. It is based on using the IStringLocalizerFactory
interface to create
IStringLocalizer instances. There is also an equivalent factory for
creating IHtmlLocalizer instances.
The first step is to create a dummy class that will be used to type the localizer. Add a new class file to the Resources folder named
CommonResources. It is an empty class, nothing more than a placeholder:public class CommonResources { }
Add a new folder to the root of the project named Services. Add a C# class file to the folder named CommonLocalizationService.cs with the following code, ensuring that you adjust the namespace to suit your application:
using Localisation.Resources;
using Microsoft.Extensions.Localization;
using System.Reflection;

namespace Localisation.Services
{
    public class CommonLocalizationService
    {
        private readonly IStringLocalizer localizer;
        public CommonLocalizationService(IStringLocalizerFactory factory)
        {
            var assemblyName = new AssemblyName(typeof(CommonResources).GetTypeInfo().Assembly.FullName);
            localizer = factory.Create(nameof(CommonResources), assemblyName.Name);
        }

        public string Get(string key)
        {
            return localizer[key];
        }
    }
}
The class takes an
IStringLocalizerFactoryas an injected dependency and then uses the dummyCommonResourcesclass to create anIStringLocalizer. The service also exposes a publicGetmethod that returns the resource value that matches the key being passed in.Register the
CommonLocalizationServicewith the DI system:services.AddSingleton<CommonLocalizationService>();
Add a resource file to the Resources folder named CommonResources.de.resx. Add the following entries to it:
Localisation Lokalisierung Privacy Privatsphäre Add another resource file to the Resources folder named CommonResources.fr.resx with the following entries:
Localisation Accueil Privacy Vie privée Add a final resource file to the Resources folder named CommonResources.en.resx with just one entry that translaterizes "Localisation" into American dialect:
Localisation Localization Inject the
CommonLocalizerServiceinto the Layout page:@inject CommonLocalizationService localizer
Make changes to the layout file as shown below:
<title>@ViewData["Title"] - @localizer.Get("Localisation")</title>
<a class="navbar-brand" asp-area="" asp-page="/Index">@localizer.Get("Localisation")</a>
<ul class="navbar-nav flex-grow-1">
    <li class="nav-item">
        <a class="nav-link text-dark" asp-area="" asp-page="/Index">@localizer.Get("Home")</a>
    </li>
    <li class="nav-item">
        <a class="nav-link text-dark" asp-area="" asp-page="/Privacy">@localizer.Get("Privacy")</a>
    </li>
</ul>
<footer class="border-top footer text-muted"> <div class="container"> © 2019 - @localizer.Get("Localisation") - <a asp-area="" asp-page="/Privacy">@localizer.Get("Privacy")</a> </div> </footer>
The changes should affect the title, navigation and footer of the site.
Run the site and use the culture switcher to switch between English, French and German, and then try one or two languages for which there are no resource files.
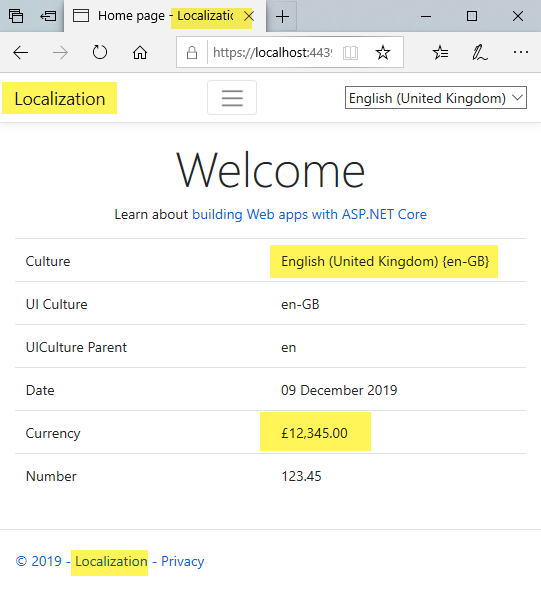
If you select the English (United Kingdom) culture, you should notice that the calendar and currency are translated as expected. In the absence of any en-GB resource file, you might expect the site name in the title, navigation and footer to fall back on the key passed in to the string localizer, but in fact, the value is pulled from the
en resource file instead. This is because en is the parent
culture for en-GB,
and the parent culture is the first fallback in the absence of a
locale-specific resource. The fallback cascade works as follows, from most specific to least specific: Locale-specific culture (e.g.
TypeName.en-gb.resx) » Parent culture (e.g. TypeName.en.resx) » Default culture (specified in
Startup) » string passed to localizer key.
Summary
This article looked at how to use resource files as part of localising the static content of a Razor Pages application. Resources were developed for a specific page, and for more general use around the site. I covered the alternative naming conventions for resource files to ensure that they are picked up, and how to configure the path to the resource files. I also briefly covered the selection and fallback process.
In the next article, I will look at how to use resources in conjunction with Data Annotation attributes to provide translations for form labels and error messages.
