The application in this article is the same one that has featured in the previous articles. It's built using the standard Razor Pages 3.1 project template with no authentication. Many of the concepts in this article were originally introduced in the previous article, so you should read that first.
The first three steps that follow demonstrate the minimum configuration to enable localisation using resources. If you are continuing from the previous article, you will have covered those:
-
In
ConfigureServices, localization is added to the DI container, specifying the location of resources in the application, and the cultures supported by the application are configured:public void ConfigureServices(IServiceCollection services) { services.AddLocalization(options => options.ResourcesPath = "resources"); services.Configure<RequestLocalizationOptions>(options => { var supportedCultures = new[] { new CultureInfo("en"), new CultureInfo("de"), new CultureInfo("fr"), new CultureInfo("es"), new CultureInfo("ru"), new CultureInfo("ja"), new CultureInfo("ar"), new CultureInfo("zh"), new CultureInfo("en-GB") }; options.DefaultRequestCulture = new RequestCulture("en-GB"); options.SupportedCultures = supportedCultures; options.SupportedUICultures = supportedCultures; }); services.AddSingleton<CommonLocalizationService>(); }
The
CommonLocalizationServiceis a wrapper around anIStringLocalizer<T>which is used to access resource files. It was introduced as a means of accessing page-agnostic resource files in the previous article. Localisation middleware is added after routing, passing in the localisation options specified in the previous step, in the
Configuremethod:var localizationOptions = app.ApplicationServices.GetService<IOptions<RequestLocalizationOptions>>().Value; app.UseRequestLocalization(localizationOptions);
A folder named Resources is added to the root of the application, containing an empty class named
CommonResources:public class CommonResources { }
Resources are accessed using a localization provider (
IStringLocalizer<T>) which needs to work with a specific type. If the resources are intended to be used in just one page, you can use the PageModel class as the type. Translations for data annotations should be made available for use in more than one page, so they need to be set up to be page-agnostic. TheCommonResourcesclass provides a page-agnostic type for the resources. It's empty (has no members) because it is just a placeholder.In the previous article, the
AddViewLocalizationextension method is used to add the view localisation services to the application's service collection. In this article, theAddDataAnnotationsLocalizationextension method is chained to enable configuration of theIStringLocalizerto be used for accessing resources that contain data annotation translations. A factory is used to create anIStringLocalizerwhich is typed to the emptyCommonResourcesclass created in the last article to support global or page-agnostic resource files.services.AddMvc().AddViewLocalization().AddDataAnnotationsLocalization(options => { options.DataAnnotationLocalizerProvider = (type, factory) => { var assemblyName = new AssemblyName(typeof(CommonResources).GetTypeInfo().Assembly.FullName); return factory.Create(nameof(CommonResources), assemblyName.Name); }; });
The example that follows demonstrates the use of data annotations on PageModel properties that represent values posted from a form. The form is a simple contact form, in which all the form fields are required.
Add a new Razor page to the application named Contact.cshtml
Add the following using directive to the top of the PageModel file:
using System.ComponentModel.DataAnnotations;
Add the following properties with data annotation attributes to the ContactModel:
[BindProperties]
public class ContactModel : PageModel
{
    [Display(Name = "Message"), Required(ErrorMessage = "Message Required")]
    public string Message { get; set; }
    [Display(Name = "First Name"), Required(ErrorMessage = "First Name Required")]
    public string FirstName { get; set; }
    [Display(Name = "Last Name"), Required(ErrorMessage = "Last Name Required")]
    public string LastName { get; set; }
    [Display(Name = "Email"), Required(ErrorMessage = "Email Required"), DataType(DataType.EmailAddress)]
    public string Email { get; set; }
}
I haven't included any handler methods in this example because the focus is not on processing posted form values.
This step builds on the shared resource files that were introduced in the previous article. Translations for the labels and the error messages are added to the English, French and German resources, along with entries for navigation to the Contact page and the submit button on the form. Only the additional entries for German resource file (CommonResources.de.resx) are shown here for brevity:
Contact Kontakt Contact Us Kontaktieren Sie Uns Email E-Mail Email Required Eine gültige E-Mail ist erforderlich First Name Vorname First Name Required Ein Vorname ist erforderlich Last Name Nachname Last Name Required Ein Nachname ist erfordlich Message Nachricht Message Required Eine Nachricht ist erforderlich Submit Senden The keys for each entry are the values passed to the
Nameproperty of theDisplayattribute, and theErrorMessageproperty of theRequiredattribute. The French resource file (CommonResources.fr.resx) needs translations for most of the same keys as the German one, except for the words Contact and Message, which are the same in French as in English. The English resource file needs "translations" for the error messages, unless you are happy with the existing (fairly concise) values assigned within the attributes.In addition to the data annotation entries, there are three further entries. These are for the navigation, the title on the contact page and the button that will be used to submit the contact form.
The navigation can be added to the layout page, using the
CommonLocalizerServicethat was created and injected into the layout page in the last article:<li class="nav-item"> <a class="nav-link text-dark" asp-area="" asp-page="/Contact">@localizer.Get("Contact")</a> </li>
Finally, the form can be created in Contact.cshtml:
@page
@inject CommonLocalizationService localizer
@model Localisation.Pages.ContactModel
@{
    ViewData["Title"] = localizer.Get("Contact Us");
}

<h1>@localizer.Get("Contact Us")</h1>
<form method="post">
    <div class="form-group">
        <label asp-for="FirstName"></label>
        <input class="form-control" asp-for="FirstName">
        <span asp-validation-for="FirstName"></span>
    </div>
    <div class="form-group">
        <label asp-for="LastName"></label>
        <input class="form-control" asp-for="LastName">
        <span asp-validation-for="LastName"></span>
    </div>
    <div class="form-group">
        <label asp-for="Email"></label>
        <input class="form-control" asp-for="Email">
        <span asp-validation-for="Email"></span>
    </div>
    <div class="form-group">
        <label asp-for="Message"></label>
        <textarea class="form-control" asp-for="Message"></textarea>
        <span asp-validation-for="Message"></span>
    </div>
    <button class="btn btn-secondary">@localizer.Get("Submit")</button>
</form>

@section scripts{
<partial name="_ValidationScriptsPartial"/>
}
The
CommonLocalizerServiceis injected into the page, and is used to provide the translations for the page title, heading and the submit button. The rest of the form could be taken from any application. It uses standard tag helpers for labels, inputs and validation messages. Unobtrusive validation is enabled through the inclusion of the ValidationScriptsPartial file.The final touch is to add some styles to the site.css file, in wwwroot/css to add some colour to inputs and messages in the event of validation failures:
.field-validation-error {
    color: #dc3545;
}
.input-validation-error {
    border-color: #dc3545;
    background-color: #ffe6e6;
}
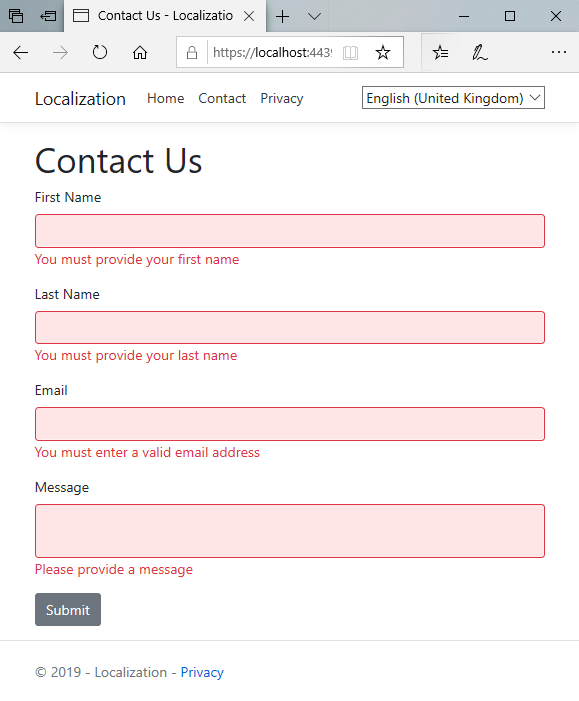
If you run the application and navigate to the contact page, you can test the localisation simply by trying to submit the empty form. The client side validation should kick in since none of the required fields have values:

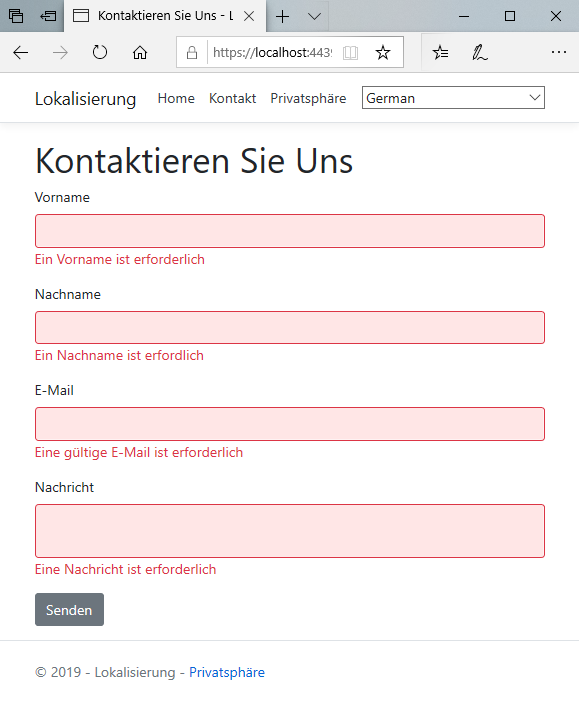
Then you can use the culture switcher to test translations:

Summary
This article demonstrates how to localise data annotation attributes in a Razor Pages application. The process is based on the use of resources and requires its own configuration.
So far, the culture for a request has been set as a query string value via the Culture Switcher view component that was created in the first article in the series. This is not a recommended approach. In the next article, I will look at how you can manage cultures via Route Data instead.
